Of late, I have seen numerous images, even landscapes where the photographer shoots a couple images, hand held and (maybe) because of which she lands up using a fast shutter speed and high ISO (to allow for a fast enough shutter speed that she can hand hold the camera). As a result, either the shot is severely underexposed (high shutter speed) or full of sensor noise (high ISO) or worse – both!
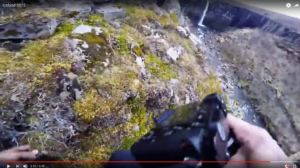
The obvious solution of course, would be to carry a tripod, but as you can see from my Iceland video screen-grab below (click to view the video), when I am scrambling up a mountainside, I may choose to hand hold the camera too.
OK. Back to the subject of underexposure. There are times when you purposely take an image that almost looks underexposed. For example, in low-key lighting where the light level is purposely kept low. The entire image is dark but even in the deepest, darkest areas of a low-key image, there is detail. In case of a truly underexposed image, the detail lost, the data clipped.
If all this sounds theoretical to you, let’s take a real case. I wake up early morning, grab my 24-70mm kit lens (with an f stop of 3.5 to 5.6) on my camera and dash off to take photos. I reach the place well before sunrise and check the viewfinder. It says, at 100 ISO a properly exposed shot would be at 1/5th of a second at f/11. Since I want “razor sharp” images, I increase my ISO to 400 (already compromising on sensor noise) so that I can take a shot at least at 1/50th because my lens was zoomed in at 50mm (a “safe” hand-holding speed is usually the inverse of the lens focal length). The shot comes out dark, but I assure myself that I can pull up details when I get home.
In making that assumption that I will be able to pull up details later, I am forgetting something fundamental about sensors – their response to light is not linear! In other words, as light increases, the sensors don’t get a proportionate amount of information, they get exponential amount of information! Let me explain.
Modern camera sensors can capture information in about 14 bits. Fourteen bits is 214 = 16,384 bits or tonal values. Imagine all these are small teeny tiny buckets. These 16,384 buckets are capturing light at around 12 light to dark levels or f-stops. It would have been fine if these buckets were evenly spread between these 12 levels, but they are not!
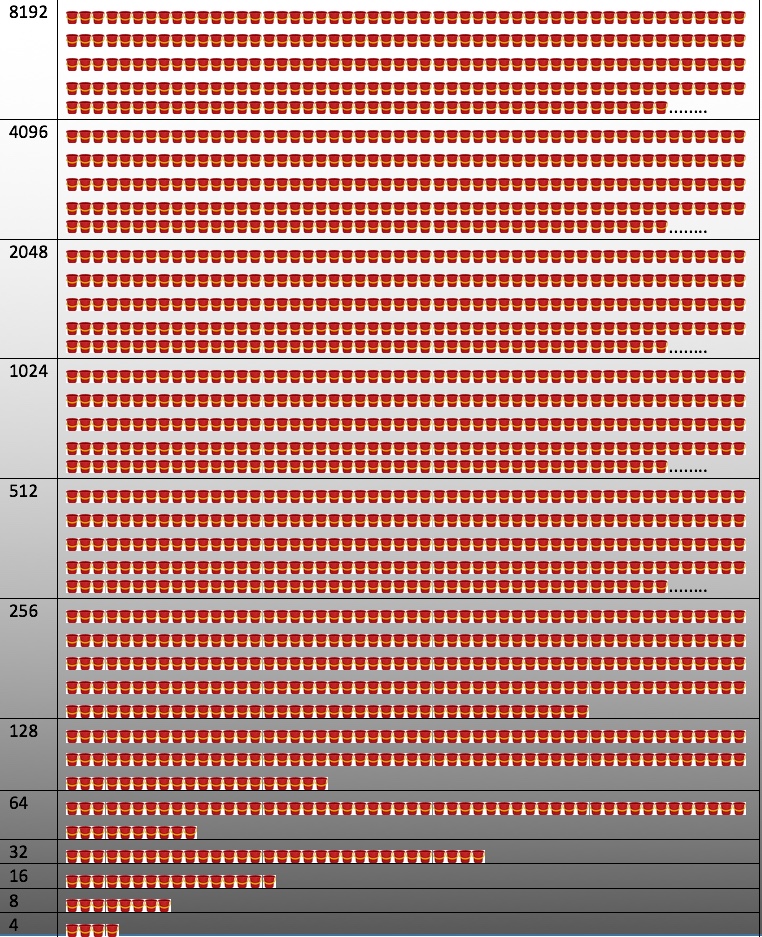
Take a look at the representation on the left. Each of the 12 f-stops, from the brightest to the darkest, has buckets that hold tonal values. Half of these (exactly 8,192) are sitting in the brightest f-stop, then the next half or 4,096 are in the next f-stop, then the third f-stop has 2,048 buckets and so on. So the last f-stop (and darkest level) has only 4 buckets in it! This should not surprise you for, as you well know, each f-stop halves the amount of light.
So if I wanted to carry home the maximum number of buckets, I should try and fill up as many to capacity, but do it cautiously. If I overfill any of the brightest ones, I will not be taking home any information from them! So, the more I expose the image without blowing the highlights, the more information I’ll take home. How does one do that? Simple, turn your exposure compensation button (assuming you have one) to the point where the image is almost overexposed. Watch the histogram carefully, and make sure that no pixel is getting blown out. The histogram will show this as a graph butted agains the right hand side of the chart, but not going over it.
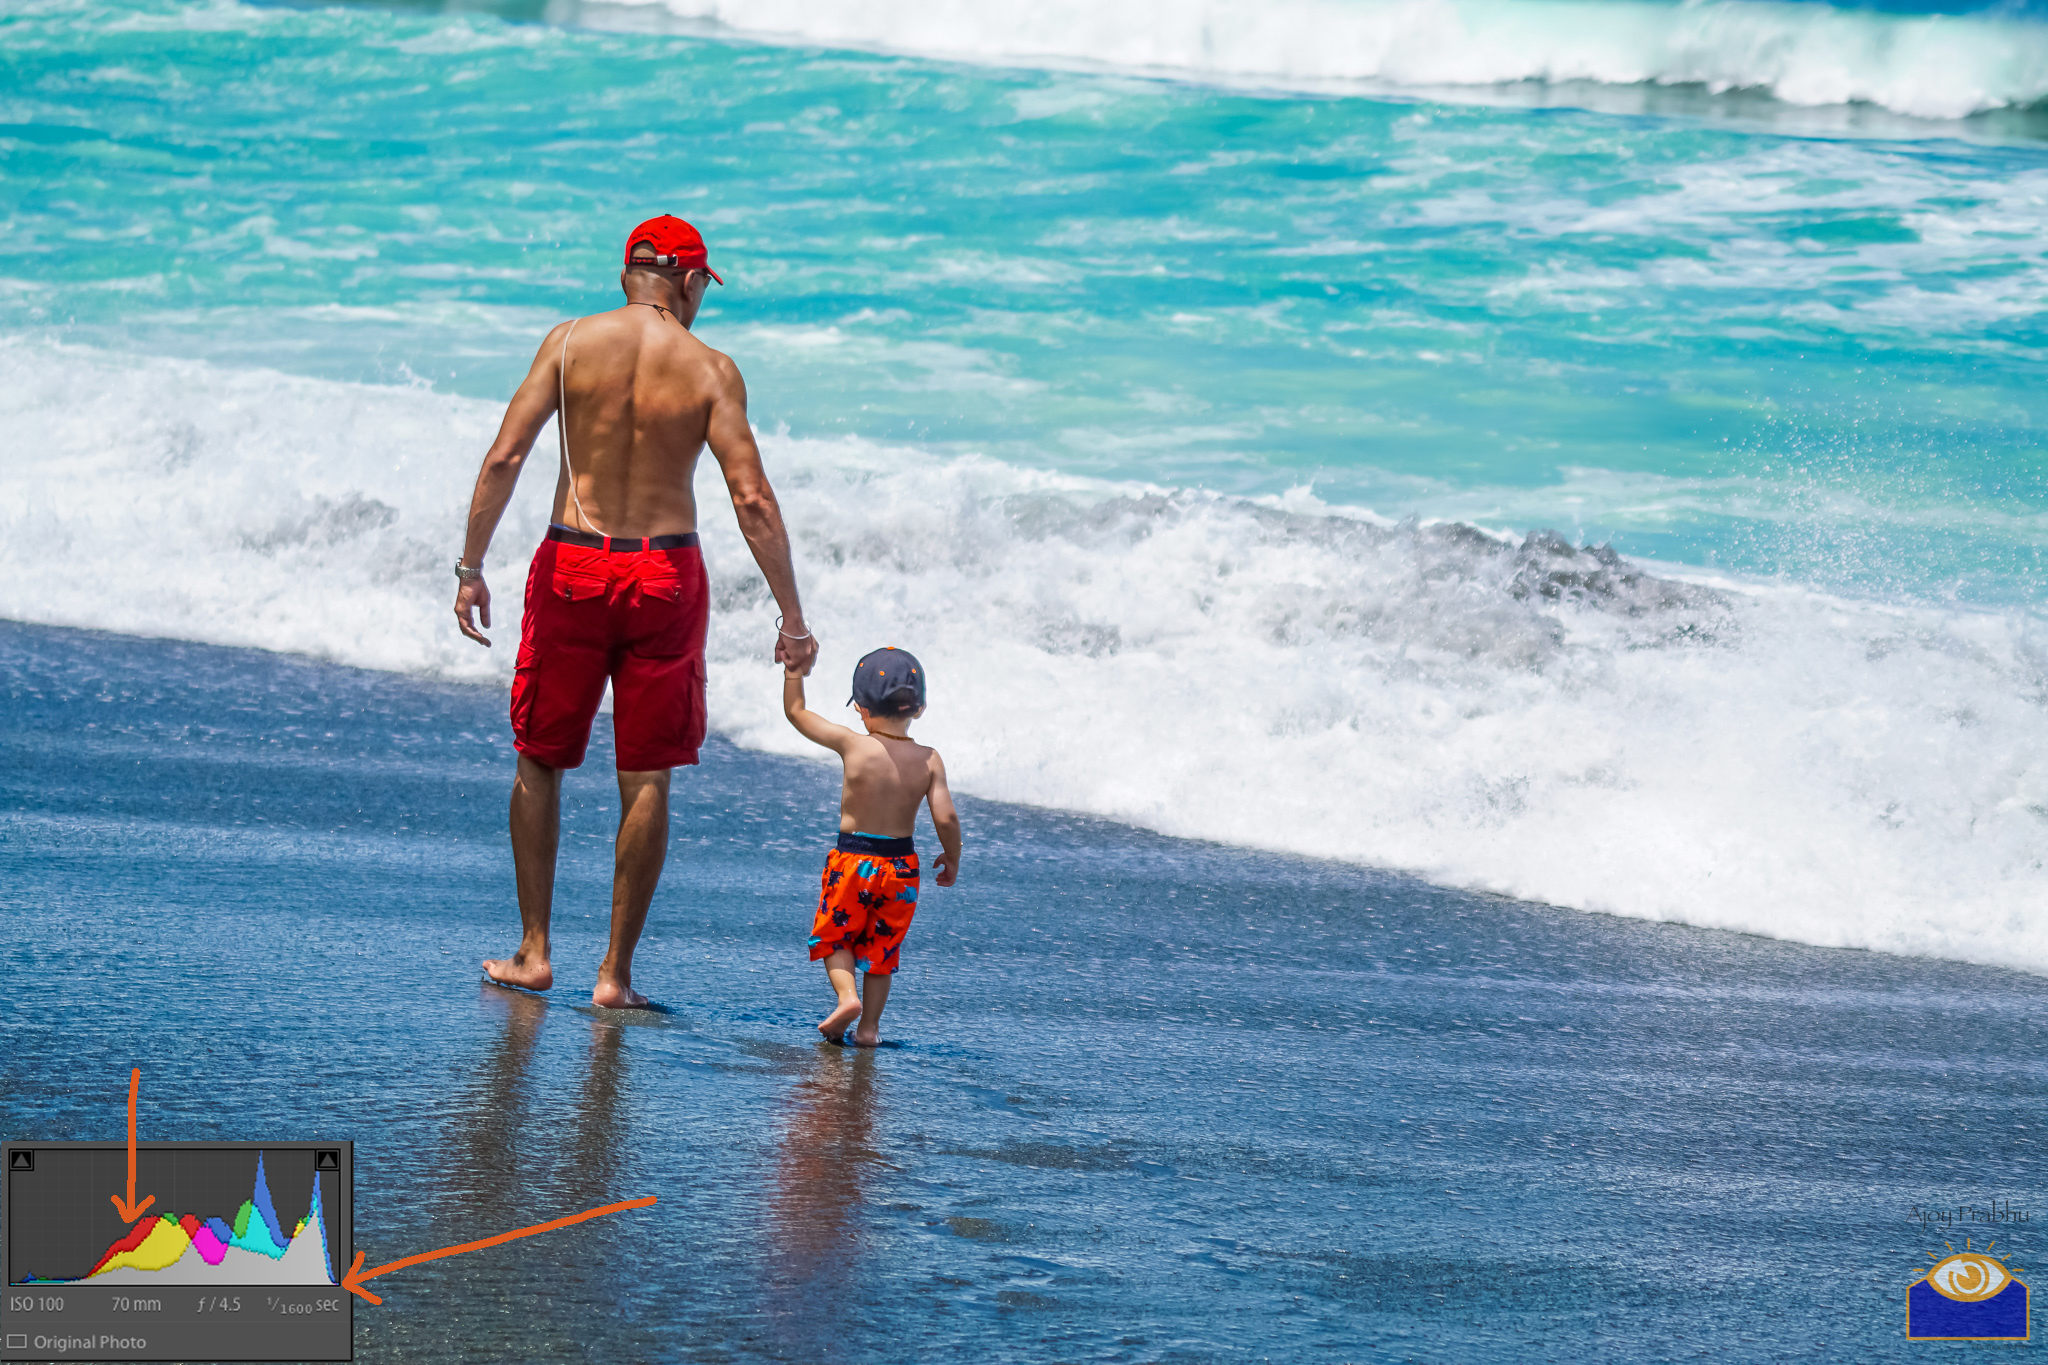
Let’s take a real-world example. Here is a recent image of my son and I, in Costa Rica. Either I handed my camera to my wife with the exposure already pushed (by about +0.3), or she did it herself, I do not recall. But please take a look at the first image (click to enlarge), which is straight out of the camera, and you will see what I mean. The sea foam is bright, a bit too bright maybe, but nothing is lost. The dark parts of the image are still pretty dark. Take a look at the histogram and the arrows I’ve drawn. The dark to mid-dark areas are suppressed, but they seem to have tonal values. Also note, that the histogram is squished against the right side, but does not go over. Which means, that the brightest areas are not so bright that we lose information.

Now, take look at the next image (click to enlarge) after I simply adjusted the shadow slider up to recover detail in there. Also note the histogram. While the left side has remained unchanged, the mid to mid-dark areas have more values!

Having read all this, you must be tempted to push the exposure on all your images. Be careful! If you overdo it, you will lose information in the brightest areas. There is nothing more off-putting and obvious when you see clouds having lost their detail! My rule of thumb is that if I am taking portraits or a quick action shot, I do not try stunts. I just take the image with the histogram smack in the middle and pray that I am not losing too much detail in the shadows.
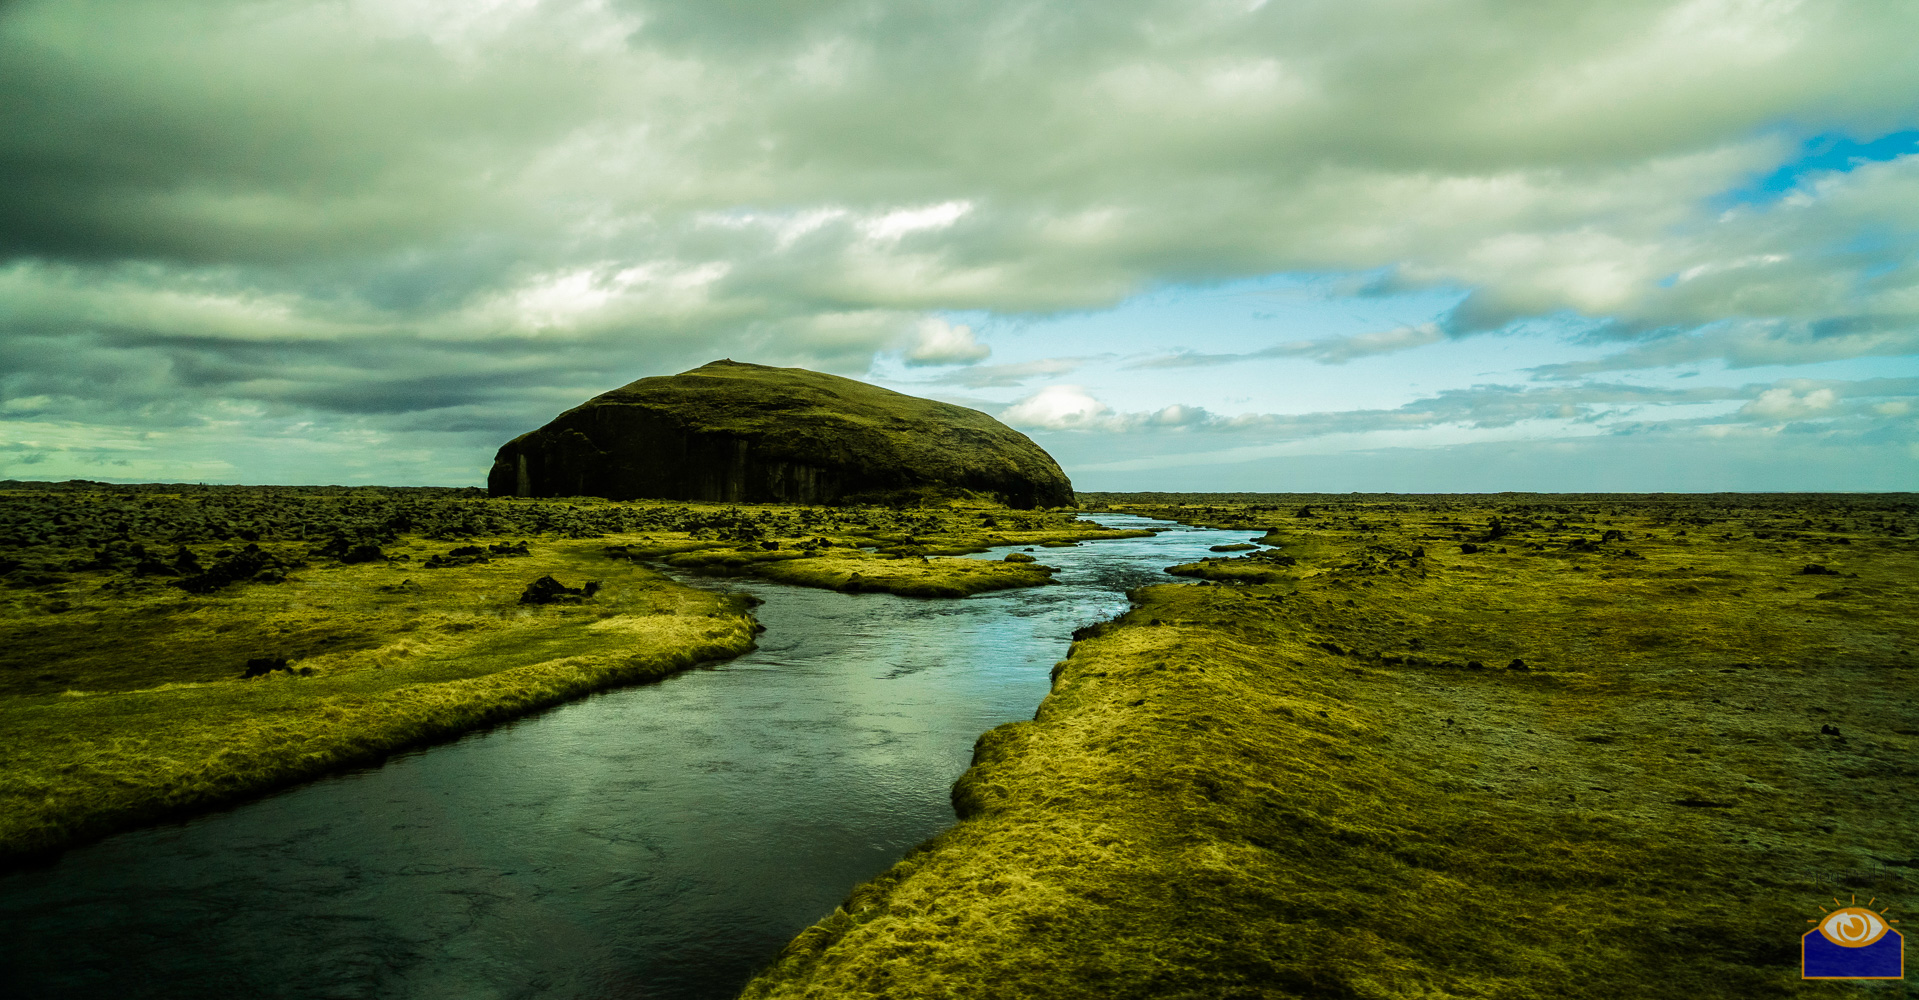
Coming back to my story – what about when doing landscapes? I try and take my tripod even if it means leaving some gear behind. This way, I can stick to a low ISO and keep my shutter speeds down to get the shot with crisp images yet have with fine detail in them.
I hope that this has been a useful guide. If you have tried this method and have questions or comments, please feel free to leave them below. I’d love to hear from you about your technique in keeping noise at bay.
Leave a Reply